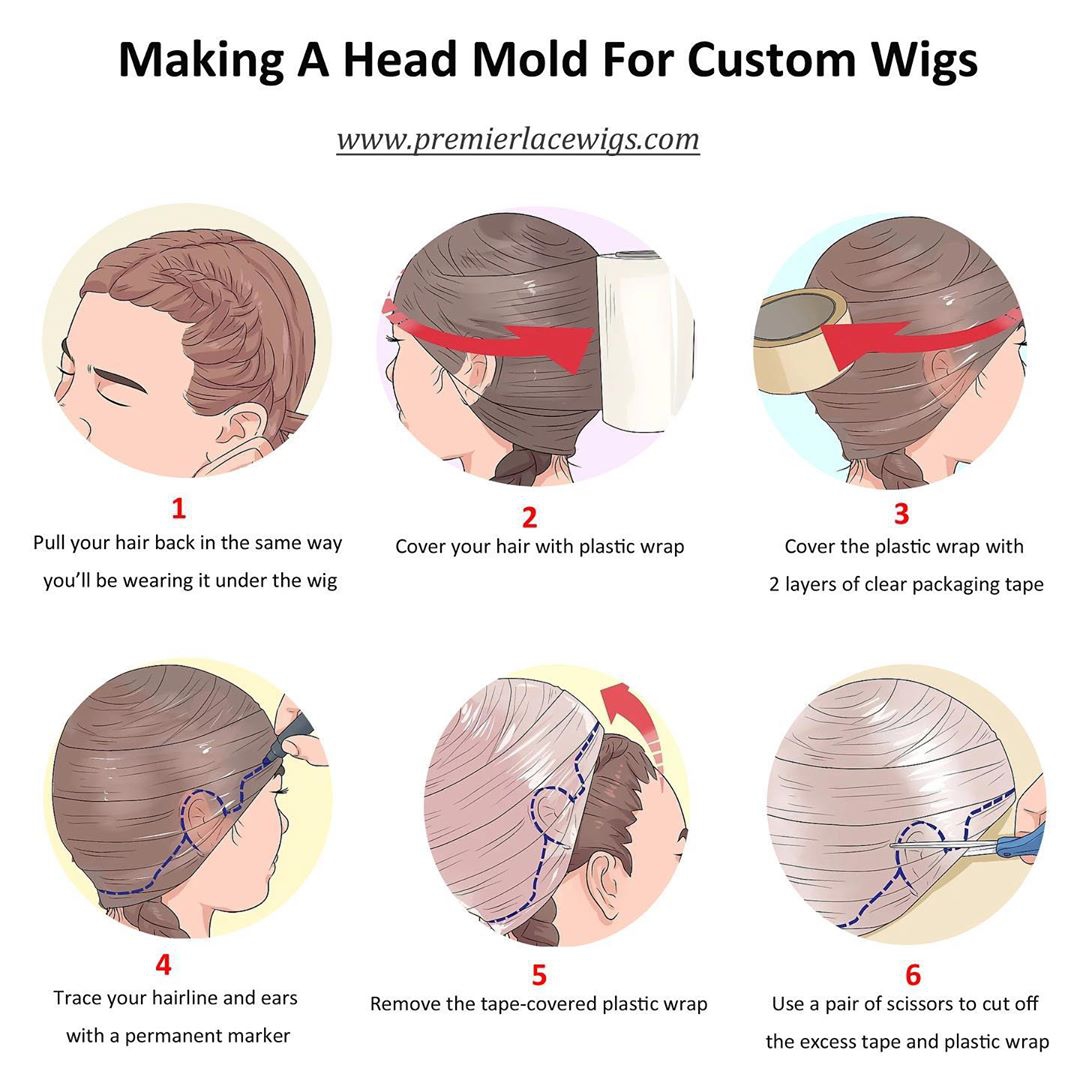
Some customers told us average size didn't fit well and also they didn't know how to measure their heads.Actually it is very easy to solve this problem.We suggest them make a head mold and send to us.Then we will customize the lace wigs as the mold and the wig size and hairline will fit perfectly when they are done. Below are 7 steps how to make a head mold.
1.Pull your hair back in the same way you’ll be wearing it under the lace wig.
2.Cover your hair with plastic wrap. Be sure to extend the plastic wrap past your hairline. This includes your ears, forehead, and nape. Extending the plastic wrap past your hairline will reduce the chances of the tape sticking to your hair in the later steps
3.Cover the plastic wrap with 2 layers of clear packaging tape. Wrap the tape around your hairline first, taking care to avoid the skin. Cover the rest of the plastic wrap in overlapping rows of tape. Do this step twice. There should be no soft spots left. If you feel a soft spot, that means you missed the plastic wrap. Cover it with a piece of tape!
4.Trace your hairline and ears with a permanent marker. It would be a good idea to get someone to help you with this, especially when you reach the back.
5.Remove the tape-covered plastic wrap. You should be able to simply slide it off of your head. If you can’t, dip your finger in water, then run it along the inside edge of the cap to separate it from your skin
6.Use a pair of scissors to cut off the excess tape and plastic wrap
7.Reinforce the inside of the plastic mold with more tape